|
Parkland
College > Fine & Applied
Arts > Graphic
Design | Web Design
>
GDS 214 WEB DESIGN II
|
|
|
|
Tricks in Dreamweaver
|
|
|
|
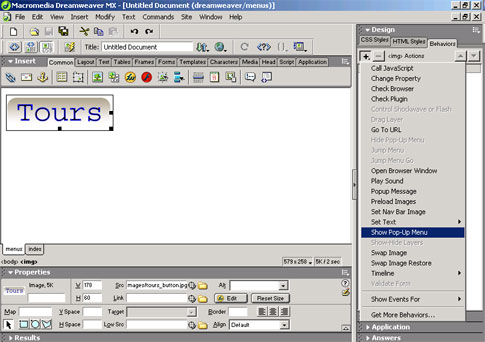
Pop up menus Before you insert a popup menu from Dreamweaver you must have an image to attach the behavior to. I created a simple button in PhotoShop for the purpose.
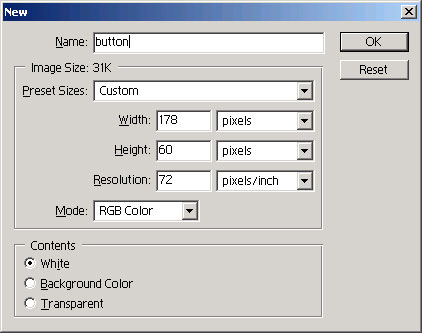
In PhotoShop... Open a new image. I made mine 178 px long and 60 px tall. You can use any image you wish.
I used the rounded rectangle tool, set the radius at 15 px and filled it with the "sun faded image" style. Then I added the Filter > Render > 3D Transform. Finally, I Added the text and saved it for the web as button.jpg. I made a copy with the letters filtered with Filter > Stylize > Emboss. Then I saved this image as button1.jpg. In Dreamweaver... Insert your image in your document in Dreamweaver. Insert > Image Open your behavoirs panel, if it isn't already open... Window > behaviors Click on the little plus sign in the behaviors window and select "show popup menu".
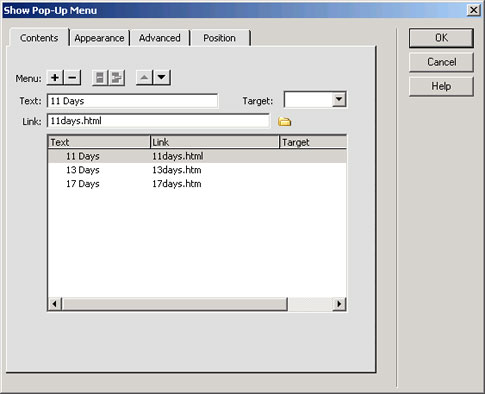
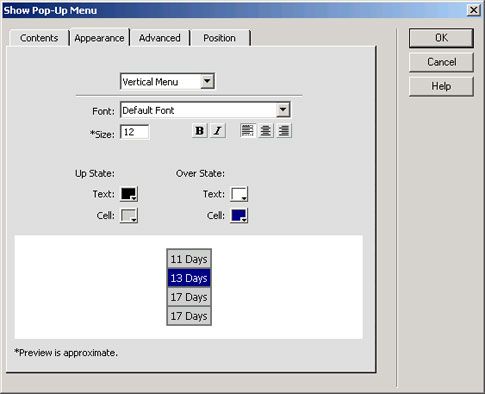
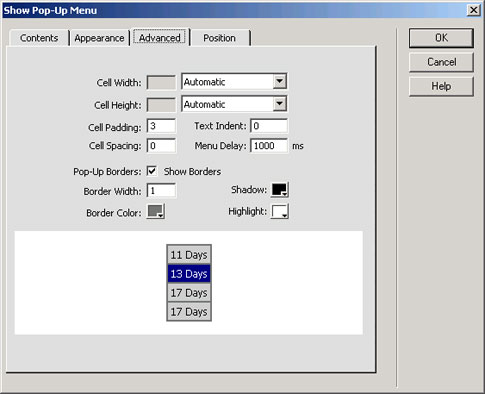
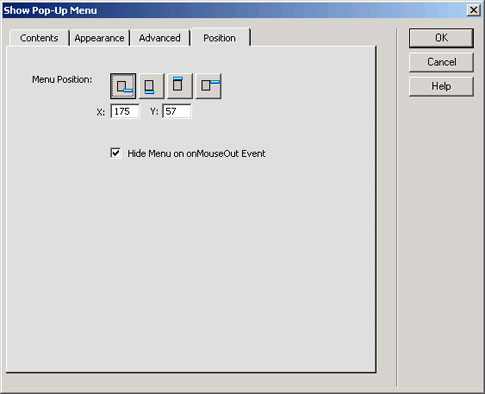
Type in your page names and corresponding URLs and click on the plus sign after entering each one. Click on the remaining three tabs to make any adjustments that you may require:
Make duplicate pages for 11days.html, 13days.htm and 17days.htm if you want this example to work. Save your work. Press F12 to view your menu in a browser. Simple Image Rollovers It's easy to do a simple rollover in Dreamweaver...
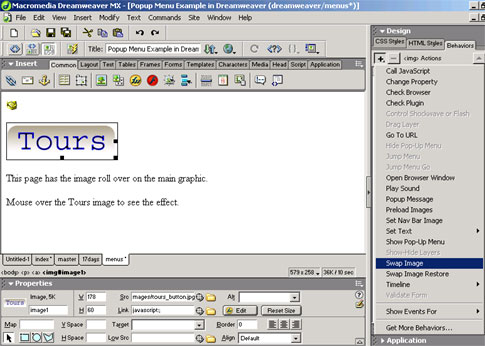
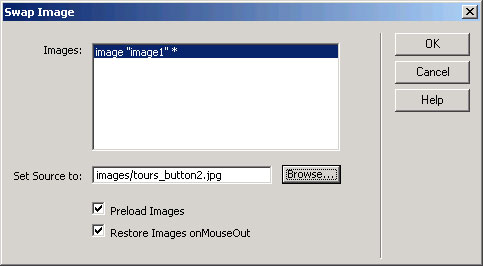
Select your image. Click on the plus sign in the behaviors window and then on "Swap Image".
Choose the image you want to replace your image with in the menu that pops up.
Click OK. Save and view your work. Note: It is easier to be sure that you are selecting the correct graphic for your rollover if you name it in the property inspector. Clicking to a new URL You might have noticed that in the property inspector the "Link"
now says:
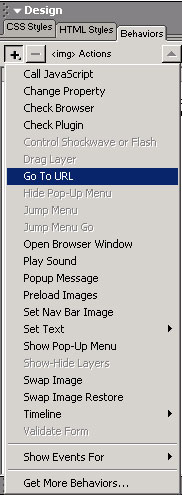
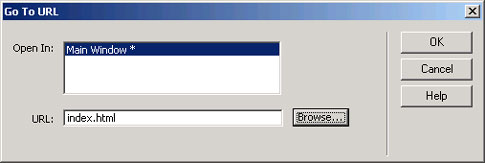
You can't just type in a URL in the link box anymore, so what do you do? You add a behavior just like we have been doing. Select you image. Click on the plus sign and select "Go to URL." Type in your URL and click OK. It's really that easy.
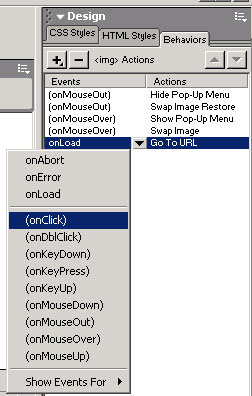
If your event handler is wrong in your behavior, click on the even handler pulldown and change it to the right one (onClick).
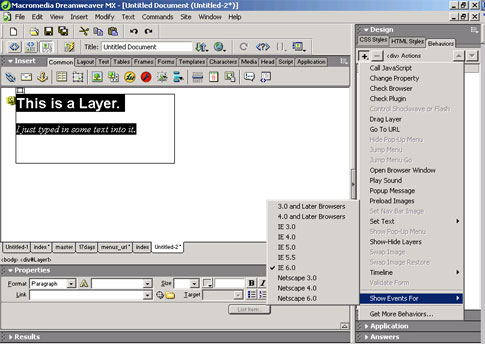
Save and view your work. More Behaviors Depending on what you have selected in your document, different behavoirs will be accessible in the behavoirs window. See the image above to see what other behaviors are availiable whaen you have the image selected. Notice that some of the behaviors like Check Browser and Check Plugin are really behavoirs that are usually attached to the body and would be avaliable even if you hadn't selected the image. Other behaviors for images are:
Depending on which type of object and which browser type you have selected, different behaviors will be avaiiable.
Click on "Show Events For" and change the settings. You will see that many of these behaviors are browser specific. As a guideline, "4.0 and Later Browsers" would usually be the best setting at this time in history the vast majority of your visitors will most likely fit into this catagory. Note: Other behaviors are avalaible for download from Dreamweaver Exchange at Macromedia.com. Check them out and see what you might find.
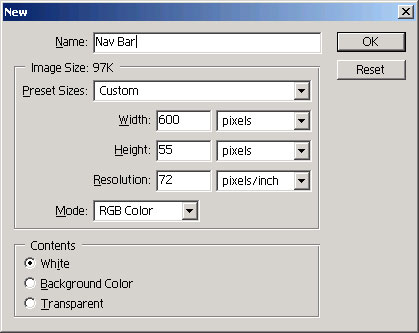
Creating a Nav Bar Do you know the difference in a navigation menu and a site buttons? Buttons are just buttons but a Navigation Menu integrates with the other buttons to let the visitor know exactly where they are in the site. In other words, the button of the page you are visiting is lit up or in some way different than the other buttons to indicate where you are. This can be a simple as reversing your rollovers on each page that you are featuring or it may be more complex where there are actually four different images for each button. Don't worry though, Dreamweaver can handle it all and in very short time. This feature will save you time and make your site more professional. This is definately worth knowing about. Before we get started, we need to create a navigation bar (a series of buttons). Since we have PhotoShop, that's where we will start. In PhotoShop... Create a new document. I made mine 600 px long by 55 px tall.
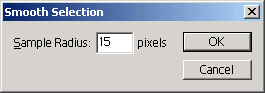
Next, I used the Rectangle Marquee Tool (R) to create a rectangle just slighty smaller than the image. You must leave approximately 5 px open around the edge of your rectangle.
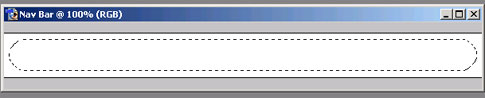
Select > Modify > Smooth Smooth your rectangle 15 px.
Your rectangle should now look like:
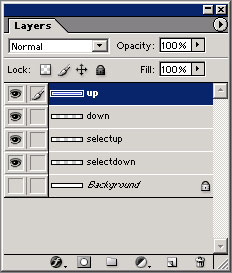
In the layers pallette, create four new layers and name them:
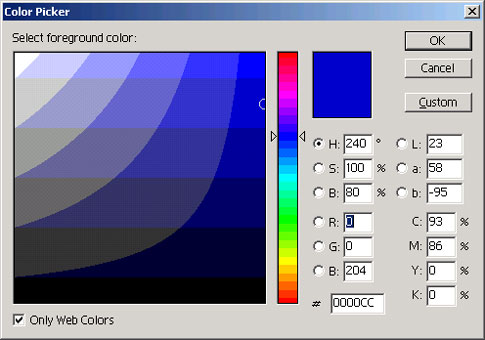
Hide your background layer by clicking on the little eye to the left of the name. Select the up layer and pick two colors for your forground and background colors. I picked R:0, G:0, B:204 for the forground.
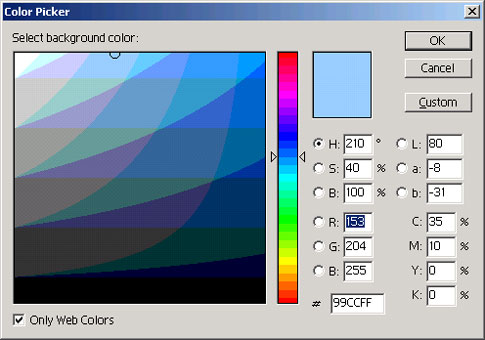
And R:153, G:204, B:255 for the background.
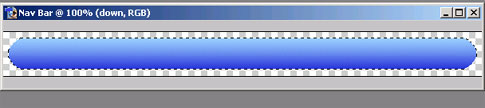
I used the gradient tool to create a linear gradient with these two colors. Just draw a line through the center of your selection. Holding down the shift key will you drag will give you a horizontal gradient. My up layer now looks like this:
Now hide the layer (by clicking on the little eye in the layer pallette. Select the Down layer in the layers pallette. Click on the reverse colors arrows in the tool bar to reverse your foreground and background colors.
Click on the gradient tool again and draw another verticle line across your layer. You should see a reverse gradient from the first layer.
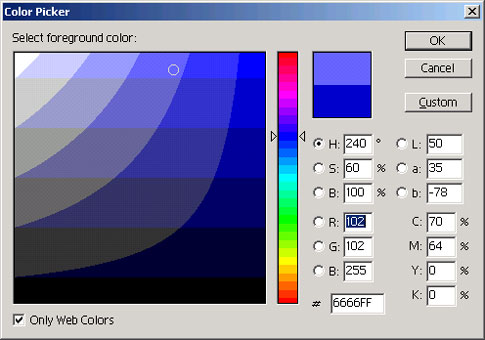
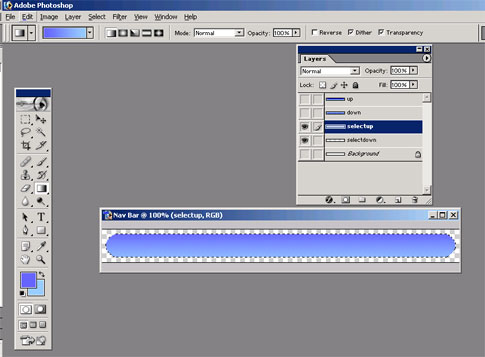
Hide that layer and click on the select up layer. Reverse the colors again by clicking on the reverse arrows in the tool bar. Change the darker color to a lighter one. I chose R:102, G:102:, B:255
Select the linear gradient tool again and draw another verticle line across the center of your document in the select up layer. My layer looks like:
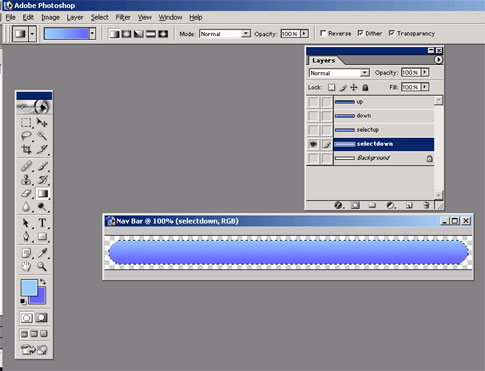
Hide your layer and click on the selectdown layer. Click on the reverse foreground and background colors again. Draw another linear gradient the same way we did in the other layers.
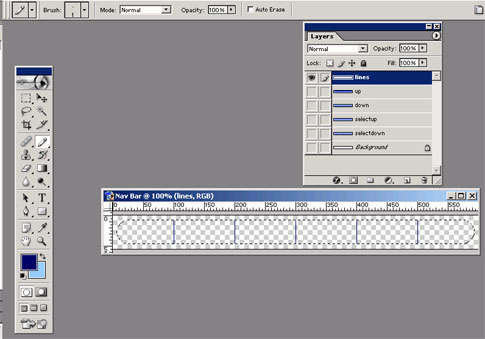
Hide the layer. Click on View Rulers. Pull out 5 guides from the left and position them at 100, 200, 300, 400, and 500. Insert a new layer and call it lines. Click on your forground color and make it darker. Then hide all of your layers except the lines layer and click on your pencil tool. Draw a line at every guide. Hide the guides to be use the lines are there.
Add a new layer for your text. Name it home. Add Text and text layers for each of your buttons.
Use the slice tool to slice out each of your buttons. Hide the down, selectup, and selectdown layers and save your image as navup. Then save it again for the web. Be sure that you put your images in a folder. I called mine slice. Go back to your psd file and hide the up layer and show the down layer. Change your text for each button to a different color. I changed mine to yellow.
Save the file as navdown.psd Save it again for the web. In the layers pallette, hide the down layer and show the selectup layer. Save the file as navselectup.psd Save it again for the web. Hide the selectup layer and show the select down layer. Change the text color for all of your buttons again. I changed mine to white.
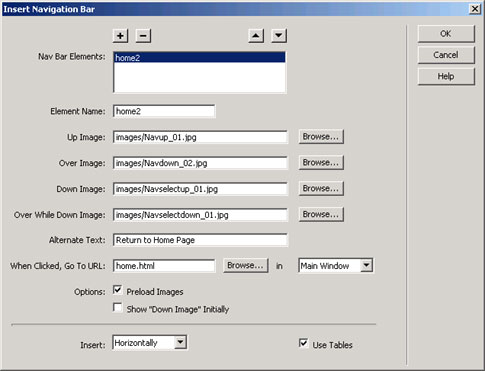
Save your file as navselectdown.psd Then save it for the web. We are done in photoshop and are ready to return to dreamweaver. Open a new html document in Dreamweaver. Save it as NavBar.html Insert > Interactive Images > Navigation Bar
Under Element name, type in "home" Add your images. The home images should be:
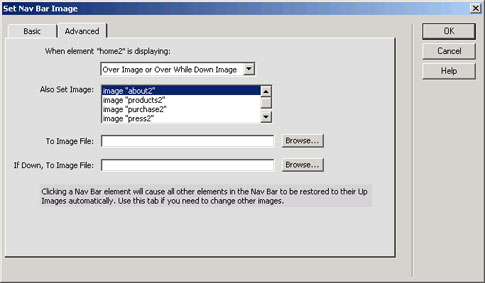
Add alternate text if you wish. I added "Return to Home Page" The add the URL you want the pahe to go to when clicked. I just made up a page here called home.html Click the plus sign when you are done and continue adding the rest of the images, alternate text and urls untill all six of you buttons are in place. Click OK. That's it. Save and view your work. If you want to effect additional images on your pages. Click on the behavior in the behaviors pallette and then click on the advanced tab. Here you can add multiple image rollovers elsewhere on your page.
View the completed file: Navbar.html Save the page 5 more times as:
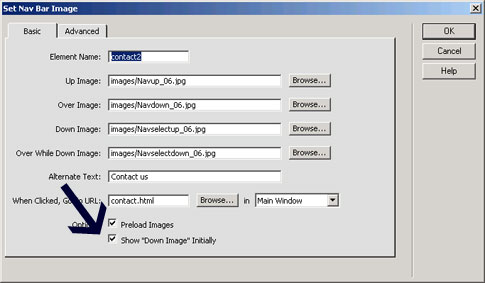
Open each of the new pages and in the behaviors pallette, click on set nave bar image. When the window opens up, select Show "Down Image" Initially.
Do the same for each one of your pages. Here is what it looks like: home.html
|


|
|
|
|
|
______________________________ Last updated: 8/26/03 Webmaster: Paul Young |