<img src="files/images/webdesign.gif" width="405" height="144">

Parkland College > Fine & Applied Arts > Graphic Design | Web Design >
Student Links > GDS 214 > Flash and PHP


GDS 214 WEB DESIGN II
Flash and PHP
Instructor: Rob Higgins


Email List Application

Flash and PHP

Open a new Flash File

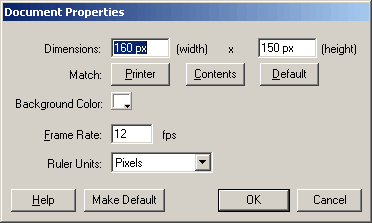
Make the dimensions 160px and the width 150px

Save your file. I called mine maillist.fla

Create a new movie clip. I named mine Mailing List

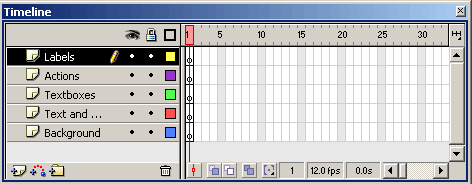
Add five layers:

  1. Labels
  2. Actions
  3. Textboxes
  4. Text and Buttons
  5. Background

Adding the Labels

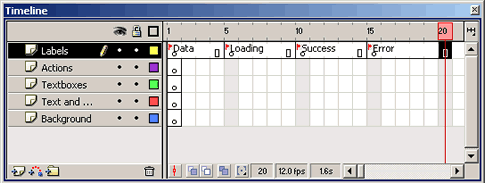
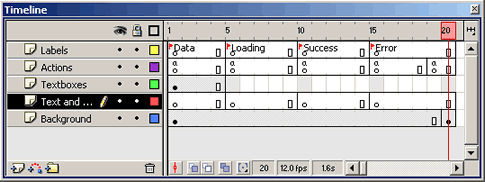
Add keyframes (F7) in the Labels layer at 5, 10, 15, and 20.

Name them:

  • Data           (at frame 5)
  • Loading     (at frame 10)
  • Success      (at frame 15)
  • Error         (at frame 20)

Adding the ActionScript

Add blank keyframes at 5, 10, 15, 18 and 20 in the Actions Layer

At Frames 5, 10, and 15, add a stop() action in the actions panel

In Expert mode, at Frame 15, add:

startTime = gettimer() / 1000;
Timeout = 5;

At Frame 18, in the expert mode, add:

Elapsed = (getTimer() / 1000) - startTime;
if (Elapsed < TimeOut) {
gotoAndPlay(_currentframe - 1);
}

Adding the Background

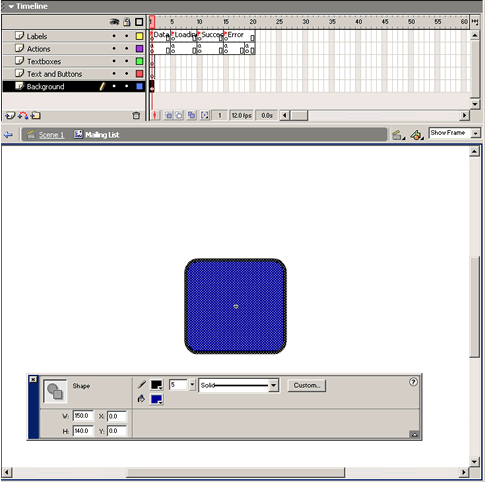
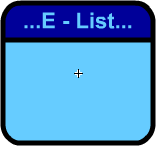
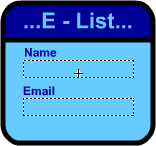
In the background layer, using the rounded rectangle and the text tool, create a background image for your interface. Add a keyframe at frame 20.

I created mine 150px wide by 140px tall.

Use the align panel to align it to the center of the stage.

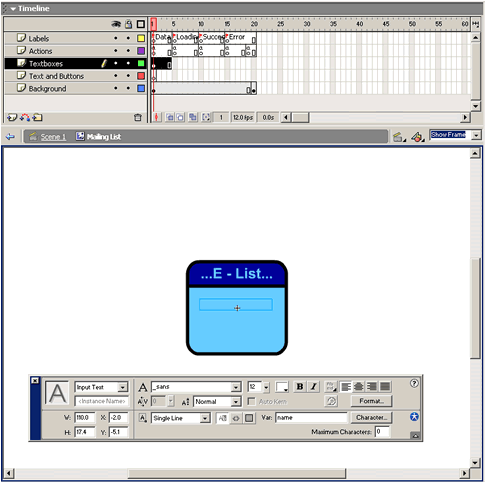
Add a frame (f5) at frame 5 of the text boxes layer

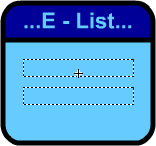
Add two input text boxes (be sure input is selected in the property inspector).

Name the var: name for the first box and email for the second.

In the text and buttons layer

Add keyframes at 5, 15, and 20 in the text and buttons layer

In the first keyframe, add the static text "name" and "email" to your graphic.

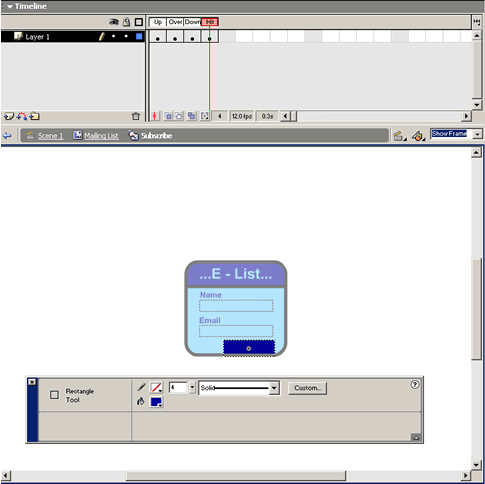
Type in the word "subscribe" below your text boxes and turn it into a button symbol.

Insert > Convert to symbol (F9)

Add keyframes to each of the button states.

Be sure to add a rectangle to your hit area.

Return to your movie clip

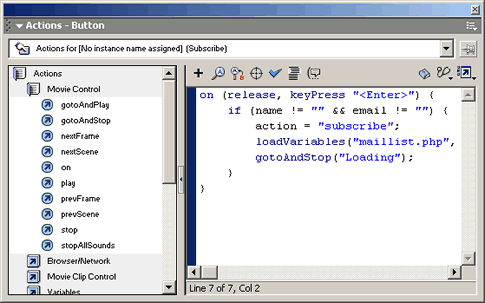
Select your button and add the following ActionScript in the ActionScripts panel:

on (release, keyPress "<Enter>") {
if (name != "" && email != "") {
action = "subscribe";
loadVariables("maillist.php", this, "POST");
gotoAndStop("Loading");
}
}

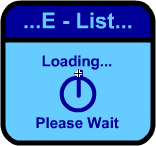
In the Loading area of the Text and Buttons layer, add the text:

Loading... Please wait.

In the success area of the text and buttons layer, add the text:

Thank You! Your details have been added to the database.

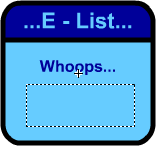
In the Error Section...

Add the static text "Whoops..."

Then add a dynamic field below it. Be sure that Dynamic Text is selected.

In the Var field, type errorMsg

Select Multiline


Click on Scene 1 to return to the main scene.

Drag in a copy of your movie clip and select it.

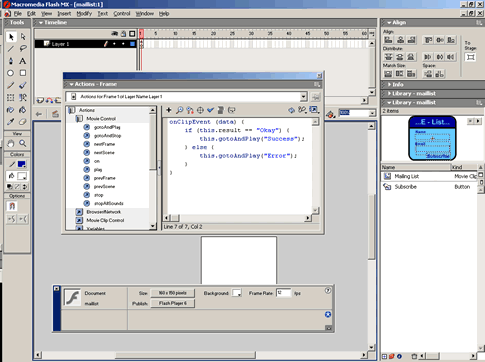
In frame 1 while the movie clip is selected, add the following actionscript in the actions palette:

onClipEvent (data) {
if (this.result == "Okay") {
this.gotoAndPlay("Success");
} else {
this.gotoAndPlay("Error");
}
}


Enter PHP

With that done we now need to build up the PHP script to handle the requests from the flash movie. We’I'll use a lot of functions in this code to keep everything easily understandable.

Before we kick into the PHP script, we need to think about how we’re going to store the user data in our text files. Since the file function will load each line of the given file into in array element it seems sensible to have one line per subscriber in the file. However, we need to store more than a single piece of data about each subscriber. The information we’ll want to store is:

• Name
• E-mail Address
• Date Subscribed

So we need a way of fitting this all on to one line whilst still being able to get at the individual bits when we need to. The answer is to use some kind of separator and then use the explode function to split the string apart when we want to get at the individual bits.


W e need to make sure that the separator we choose isn’t likely to crop up in any of the data fields we want to store, or else it’ll cause problems when we come to explode the string. A commonLy used separator is the “|” character and this is the one we’ll be using in this application.

Just so you’re sure about what’s going on here, take a look at a few entries from my text subscriber file:

Rob Higgins| rhiggins@shout.net|998254219
Robert| robhiggins@robhiggins.com|998297924
Administrator| admin@faxswitch.com|998299352

Here is how the different data fields are separated. The number at the end is the UNIX time stamp.

Here is the code

<?
// maillist.php

//The first thing we do is check that the required data has been sent.

if (!isset($email) || !isset($name) || empty($email) || empty($name)) {
fail("Both a name and an email address are required");
}

//we convert the email address to all lower case

$email = strtolower($email);

//we use a switch statement to check the valuse of the $action variable

switch($action) {
case "subscribe":
subscribe($name, $email);
break;

case "unsubscribe":
unsubscribe($email);
break;

default:
fail("Unknown action: $action");
}

//here is the function subscribe options for various errors

function subscribe($name, $email) {

if (isSubscribed($email)) {
fail("$email already subscribed to mailing list");
}

$joinDate = time();

//here we open the subscriber dat file

$file = fopen('subscriber.dat', 'a+');

if (!$file) {
fail("Error: Couldn't open subscriber file");
}

fputs($file, "$name|$email|$joinDate\n");
fclose($file);

success();
}

//here is the unsubscribe function

function unsubscribe($email) {
if (!isSubscribed($email)) {
fail("$email not subscribed to mailing list");
}

$subscribers = file('subscriber.dat');

if (!$subscribers) {
fail("Error: Couldn't open subscriber file");
}

foreach($subscribers as $count => $subscriber) {
$info = explode('|', $subscriber);

if($info[1] == $email) {
unset($subscribers[$count]);
}
}

$file = fopen('subscriber.dat', 'w');

if (!$file) {
fail("Couldn't remove subscriber from file");
}

foreach($subscribers as $subscriber) {
fwrite($file, $subscriber);
}

fclose($file);

success();
}

//here is the email function

function sendEmail($email, $name) {
$mailTo = "$name <$email>";
$mailFrom = "From: Rob Higgins Mailing List <rhiggins@shout.net>";
$mailSubject = "Your registration confirmation...";
$mailBody = "Dear $name,\n\nYour details have been added to the mailing list. Details of the latest scripts will be mailed to you at $email. You can also check out the latest developments at http://www.robhiggins.com\n\nIf you wish to remove yourself from this mailing list at any time use the following link:\nhttp://www.robhiggins.com/maillist.php?Action=unsubscribe&Email=$email\n\nThank you!\n\nRob Higgins Team";
mail($mailTo, $mailSubject, $mailBody, $mailFrom);
}

//here is the email notification function

function mailAdmin($email, $name) {
$mailTo = "Rob Higgins<rhiggins@shout.net>";
$mailFrom = "From: Rob Higgins Mailing List <robhiggins@robhiggins.com>";
$mailSubject = "New Subscriber Alert...";
$mailBody = "$name ($email) has just signed up";
mail($mailTo, $mailSubject, $mailBody, $mailFrom);
}


function isSubscribed($email) {
$matchFound = false;
$subscribers = file('subscriber.dat');

if ($subscribers) {
foreach($subscribers as $count => $subscriber) {
$info = explode('|', $subscriber);

if($info[1] == $email) {
$matchFound = true;
}
}
}

return $matchFound;
}

function isBanned($email) {
return false;
}

function fail($errorMsg) {
$errorMsg = urlencode($errorMsg);
print "&result=Fail&errorMsg=$errorMsg";
exit;
}

function success() {
print "&result=Okay";
exit;
}

?>


The Administrator Interface.

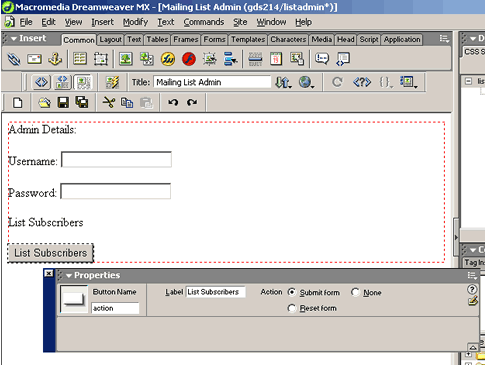
In Dreamweaver...

Create a HTML page called listadmin.html

Insert a form tag into your document.

Add two text fields.
In the property inspector:

  • Name the first one "inUsername" and the second "inPassword"
  • Check the single line for the first (inUsername) and password for the second (inPassword)

Add a submit button. Name it "Action" and change the text to "List Subscribers"

Add another text field and name it: "mailsubject"

And add a multiline text area named: "mailBody"

Add a submit button and name it "action"

Make the Value Send Mail

edit the form action to include the address of your maillist-admin.php page.


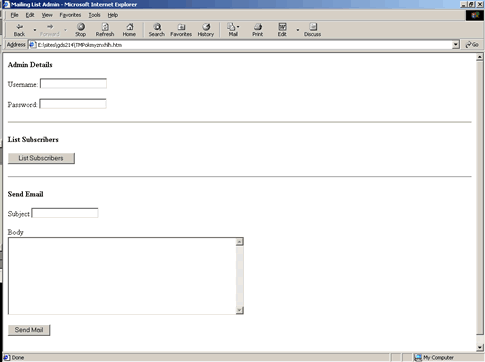
Your page should now look like:

The Code should be:

<html>
<head>
<title>Mailing List Admin</title>
<meta http-equiv="Content-Type" content="text/html; charset=iso-8859-1">
</head>

<body>
<form action="http://robhiggins.com/gds214/maillist-admin.php" method="post" name="admin" id="admin">
<p><strong>Admin Details</strong></p>
<p>Username:
<input name="inUsername" type="text" id="inUsername">
</p>
<p>Password:
<input name="inpassword" type="password" id="inpassword">
</p>
<hr>
<p><strong>List Subscribers</strong></p>
<p>
<input name="action" type="submit" id="action" value="List Subscribers">
</p>
<hr>
<p><strong>Send Email</strong></p>
<p>Subject
<input name="mailSubject" type="text" id="mailSubject">
</p>
<p>Body<br>
<textarea name="mailBody" cols="60" rows="10" id="mailBody"></textarea>
</p>
<p>
<input name="action" type="submit" id="action" value="Send Email">
</p>
<p>&nbsp; </p>
</form>
</body>
</html>


The Admin PHP

Here is the code for the maillist-admin.php file:

<?
// Define subscriber file
$subsFile = 'subscriber.dat';

// Define admin username and password
$adminUsername = "rhiggins";
$adminPassword = "instructor";

// If supplied username/password do not match above
if ($inUsername != $adminUsername || $inPassword != $adminPassword) {
// Output error information and quit
print "Invalid username or password";
exit;
}

// Decide on what action we need to take
switch($action) {
// Fetch list of subscribers
case "List Subscribers":
fetchList();
break;

// Send email to subscribers
case "Send Email":
sendEmail($mailSubject, $mailBody);
break;

default:
print "Unknown action: $action";
exit;
}

function fetchList() {
// Register global variables
global $subsFile;

// Attempt to open subscriber file
$subscribers = file($subsFile);

if (!$subscribers) {
// Output error information and quit
print "Couldn't open subscriber file or no subscribers listed";
exit;
}

// For each subscriber line...
foreach($subscribers as $count => $subscriber) {
// split subscriber info into array
$info = explode('|', $subscriber);

// Assign array to meaningful variable name
$name = $info[0];
$email = $info[1];
$joined = $info[2];

// Create a readable joined date out of timestamp
$joined = strftime("%D", $joined);

// Output information for each subscriber
print "<b>Subscriber $count</b><br>";
print "Name: $name<br>\n";
print "Email: $email<br>\n";
print "Joined: $joined<br>\n";
print "<br>\n";
}
}

function sendEmail ($mailSubject, $mailBody) {
// Register global variables
global $subsFile;

// Set up reply address for mailing list
$mailFrom = "Mailing List <you@youremail.com";

// Ensure that subject and body of email have
// automatically inserted escape slashes removed
$mailSubject = stripslashes($mailSubject);
$mailBody = stripslashes($mailBody);

// Attempt to read subscriber file
$subscribers = file($subsFile);

// If file open failed...
if (!$subscribers) {
// Output error information and quit
print "Couldn't open subscriber file or no subscribers listed";
exit;
}

// For each subscriber line...
foreach($subscribers as $subscriber) {
// split subscriber info into array
$info = explode('|', $subscriber);

// Assign array to meaningful variable name
$name = $info[0];
$email = $info[1];
$joined = $info[2];

// Build to address including subscriber name
$mailTo = "$name <$email>";

// Send email to
mail($mailTo, $mailSubject, $mailBody, "From: " . $mailFrom);
}

print "Email sent to all subscribers";
}

?>


The data file

The last thing you need to do is create a dat file for your information.

go to notepad or another text editor and create an empty file and name it subscriber.dat

Upload to your server and change the permissions to 777

chmod 777 subscriber.dat


Upload all files to your server and be sure that the paths are correct in your form and in your other pages.

Everything should be cool.

Here are the files:


______________________________

Last updated: 8/26/03• Webmaster: Paul Young


Tips, Tricks
& Handouts

Student
Links