| Parkland
College > Fine & Applied Arts
> Graphic
Design | Web Design
>
GDS 214 WEB DESIGN II Files: |
|
|
|
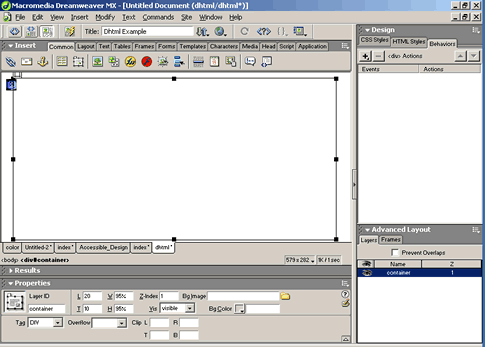
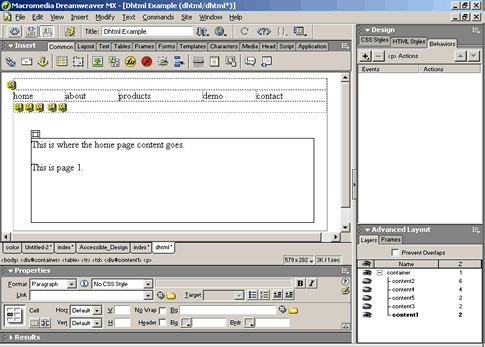
Simple DHTML with flash buttons Open a new basic html page in Dreamweaver and save it. I called mine dhtml.html Click inside the page. Insert a layer Insert > Layer Open the Layers Palette Window > Others > Layers (F2) In the property inspector... Rename your layer to "container" Change...
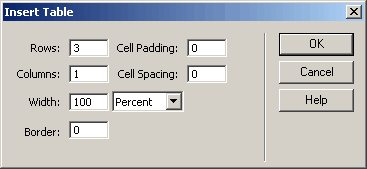
Click inside the container layer. Insert a table with 3 rows and one column that is 100% wide. Insert > Table (Ctrl + Alt + T)
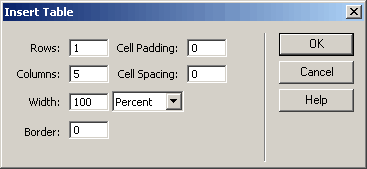
Click inside the second row and insert another table with 1 row and 5 columns also 100% wide.
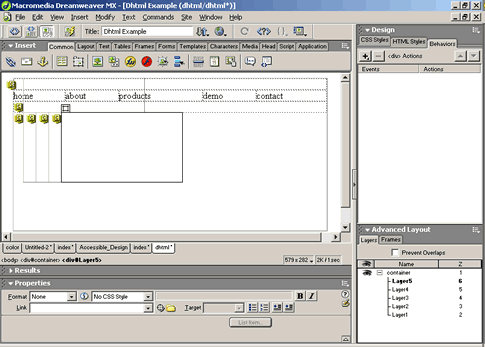
Type in the 5 names of your pages into the 5 cells you just created. for this exercise I called mine:
Click inside the third row of your table and insert a layer. Insert > Layer Select your layer in the layer Palette and then add four more layers for a total of 5 layers. Insert > Layer (4 more times)
In the layer Palette or in the property inspector change the names of your layers to something meaningful. I called mine:
Click on each of your layers in the property inspector and change:
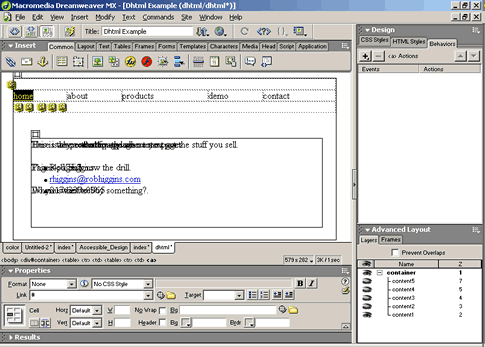
Click on the little eye in the layers Palette on one layer at a time to view it. Open the little eye icon and then click in your layer. Add your content. I just added some simple text to make this exercise easy. Obviously, your would want to add your creative genius here. After you add the content to the first layer, close the eye by clicking on it and then repeat for each of your layers until you have content in all of your layers.
Now for the fun... Click on your first layer (content1) and make it visible either in the property inspector or in the layers Palette (show the eye). Be sure that all the other layers are hidden (the eye looks like it is closed). Highlight your first page name in the second row of your table. Mine is called "home" Type in a number sign (#) in the link box in the property inspector.
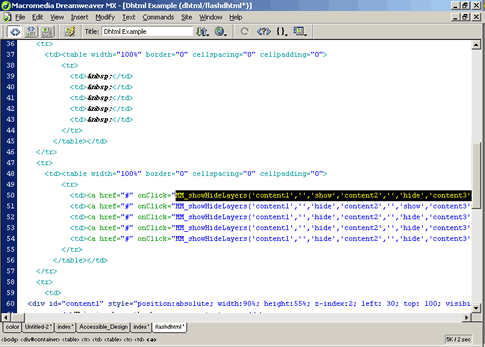
If the behaviors Palette isn't already open, open it. Window > Behaviors (shift + F3) With your text still highlighted, click in the plus sign in the behaviors Palette and select show hide layers. Highlight your content1 layer and then click on "show layer". Use the down arrow or click on the next content layer and press "hide layer" until all of your content layers are hidden. Don't do anything to the container layer.
Repeat this process for each of your links. Don't forget to put the # symbol in the link box in the property inspector before you try to add your behavior. For your second link, show the content2 layer and hide the rest. For the third link, show the content3 layer and so forth until all 5 links have behaviors attached to them. Note: The event handler in the behaviors Palette should default to onClick. If not click on the event in the behaviors panel and then change it to onClick. Save and view your work. You should now have a simple dhtml page. Now bring in the Flash Buttons... Save your file as flashdhtml.html Click in the first row of your table (the one we left empty), and add a new table with one row and five columns with he width set at 100%. (This step is identical to the table we inserted in our second row where we put our text links.)
Select the home text link in the second row and then click on code view. Select everything between the quotation marks after the onClick= and copy it. Select and copy: MM_showHideLayers('content1','','show','content2','','hide','content3','','hide','content4','','hide','content5','','hide')
Click in the first column of the first row of your table and insert a flash button. Insert > Interactive Images > Flash button I selected the Star Spinner.
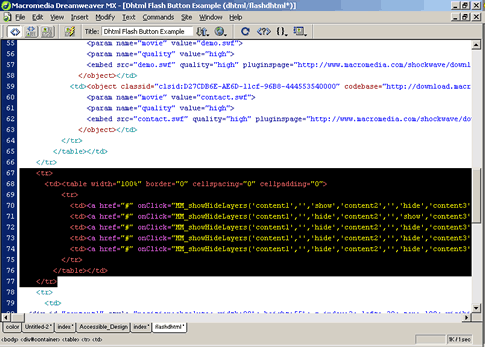
But here is the part that makes it all work... In the Link: box, type in: JavaScript: then paste in the code that you just copied from your first link a minute ago. the code should be: JavaScript:MM_showHideLayers('content1','','show','content2','','hide','content3','','hide','content4','','hide','content5','','hide') Now repeat this 4 more times so all of your remaining cells in your top table row contain a flash button with the script from the link pasted in as be just did. Save your work and check you page. All of your flash buttons should be changing your layers. Select your second row where your text links are. Go into code view and be sure that the entire row is selected (Everything between the <tr></tr>) Delete it. Optionally, you could have moved this row down to the bottom where it could be your footer.
Save your work and view it. All that's left to do is to add your content. You can use tables or css if you wish to format your information so it's just right. Good luck.
|
|
|
|
|
|
|
|
|
|
______________________________ Last updated: 11/12/03• Webmaster: Paul Young |
|
|
