| Parkland
College > Fine & Applied Arts
> Graphic
Design | Web Design
>
GDS 214 WEB DESIGN II
|
|
|
|
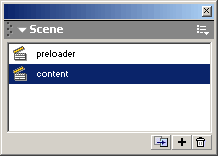
Flash Preloaders Not all of us are fortunate to have high speed internet connections and some of us aren't very good at optimizing our flash files so either way, you need to know how to make a preloader for your flash presentations. Simple PreloaderOpen the file you want to add your preloader to or open a new file if you want to add your content after you construct the preloader. Obviously, your preloader won't do anything if you don't have something to preloads. For this exercise, we will add a preloader to bigmovie.fla The files: First, we need to add a new scene to use for our preloader. Open the Scenes Panel. Window > Scene (Shift F2) Rename your existing scene to "content" by clicking on the name in the Scenes Panel then, either click on the "add scene" button on the bottom of the scene panel or... Insert > Scene Name the new scene "preloader" and drag it to the top in the Scene Panel.
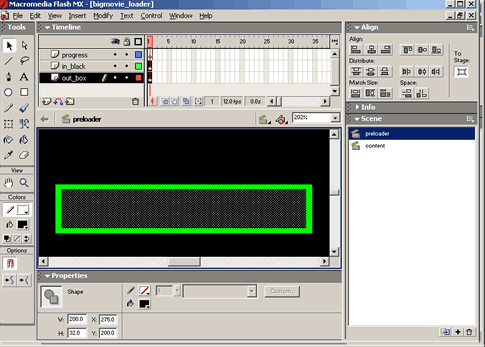
In the out_box layer make colored rectangle. I made mine 210 px wide and 40 px tall. In the in_box layer make a black rectangle (if your background is black otherwise use the color of your background). I made mine 200 px wide and 32 px tall. I used the align tool to be sure that everything is lined up properly.
Select the black rectangle in your in_box layer and convert it to a movie symbol. Name it: whiteSpace Insert > Convert to Symbol (F8)
In the property inspector, name the instance of the movie symbol to whiteSpace.
In the progress layer, draw a rectangle with a different color or the same color as your you used for your out_box rectangle. I used a green radial gradient since my out_box color is green (#00FF00). In the property inspector, resize your rectangle. I make mine 32 px tall and 10 px wide. Convert your rectangle into a movie symbol. Name it myProgressBar. Insert >Convert to Symbol (F8)
Name the instance of myProgressBar to the same name (myProgressBar) in the property inspector.
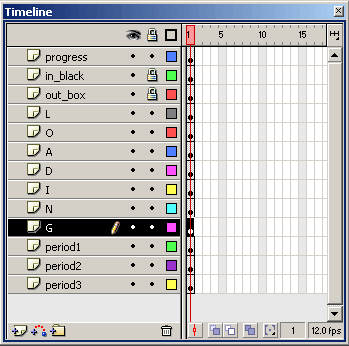
Create a new layer called loading. In the loading layer, select the text tool and type in the word "Loading..." above your rectangle. With the text selected, break apart your text twice and then distribute it to layers. Modify > Break Apart (Ctrl B) Modify > Break Apart (Ctrl B) Modify > Distribute to Layers ( Ctrl + Shift + D) Rename your layers by the letter name. (l for the l layer, etc. I used period1, and period2, etc for my period layers) Drag the layers to the correct order.
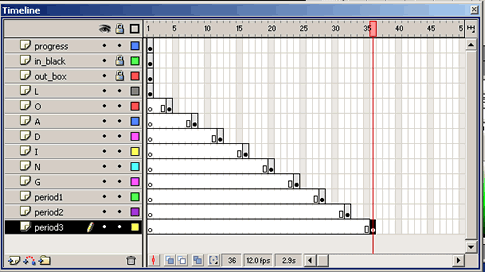
Starting with the O layer, drag your letters out 4 frames per letter.
Select all layers another 4 frames out (at frame 40). Shift + Click Insert a keyframe on all layers. Insert > Keyframe Adding the Action ScriptAdd a new layer above all of the others called actions If the actions panel is not visible, open it. window > actions In frame one of the actions layer, in expert mode in the actions editor, type in: xLoc = myProgressBar._x; Insert a keyframe at frame 3 and add the following actionsctipt:
if (_framesloaded >= _totalframes) { fractionLoaded = _framesloaded/_totalframes; Here is the commented script so you can see what we did: //test to see if all the frames are loaded. If so, leave the
preloader if (_framesloaded >= _totalframes) { //The following line defines the fraction of the movie that is loaded. fractionLoaded = _framesloaded/_totalframes; //The inner progress box will be the width of the whiteSpace // Five pixels must be subtracted from new _x of the progress
bar because Insert a keyframe at frame 40 (last frame) in the actions layer and add the following actionScript: gotoAndPlay(2); That's it for the preloader. Check you main movieIn your main movie (content scene), you will need to be sure to add either a stop action or a gotAndPlay action to be sure that the preloader doesn't repeat itself. If you want you movie to stop, add an actions layer and a keyframe on the last frame of your movie, then type in the following: stop(); if you want it to loop use: gotoAndPlay(1); View your work Test your movie in the flash playerControl > Test Movie (Ctrl + Enter) Set your settings to 14.4 Debug > 14.4 View the bandwidth profiler View > Bandwidth Profiler (Ctrl + B) See what the streaming is like at 14.4 View > View Streaming The files:
Other Preloaders Here are a few preloaders from Todd Yard's chapter on Friend's of Ed's - 50 most wanted Flash Techniques book.
|
|
|
|
|
|
|
|
|
|
______________________________ Last updated: 11/12/03 Webmaster: Paul Young |
|
|


