GDS 214 WEB DESIGN II Information
Page
Instructor: Rob Higgins
Motion Text
As we learned in Exercise
1, text grabs your attention when it's moving. By using
Flash MX, you can add motion to the written word in to help
create emotion, interest and simply make the experience more
fun for the viewer.
In this exercise, we will learn several popular methods for
motion text:
Tweening
Star Wars Effect
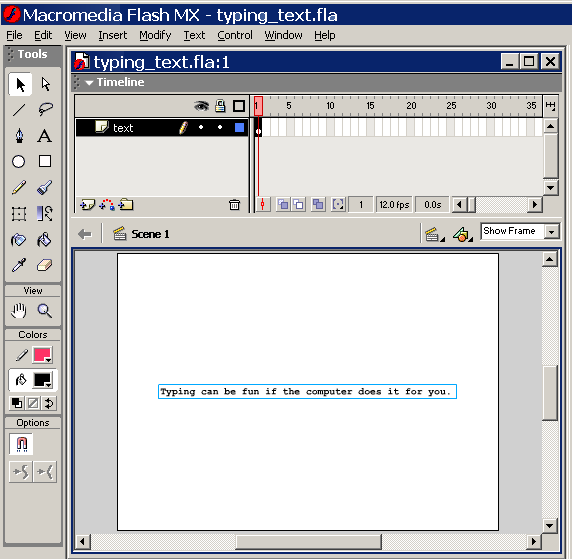
Type Writer Effect
Written Text Effect
The Effect:
Open Flash MX - Then either
use the default document or create a new one with: File >
New (Ctrl + N)
Change the Background Color
- Modify the page properties box. Leave everything to the
normal default settings except for the background color. Change
the background color to black (#000000): Modify > Document
(Ctrl + J)
Add Layers - Add two
more layers for a total of three layers. Name the layers:
actions, text and guide. Click on "show all" from
the pull down to the far right of "Scene 1".
Add the guide layer - We will
change the layer titled "guide" into a guide layer.
A guide layer is a layer that will not show up on the published
flash file. It is only used for reference.
Select the layer that you renamed "guide", then:
Modify > Layer
When the Layer Properties Box opens check "Guide"
and then click "Ok".
Now you will notice a little T- Square
(to me it looks like a hammer) next to the tile of your layer
now. This means that your layer is now a guide layer and will
not be rendered in your final project.
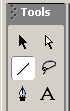
Inset Guide Lines - In the
"guide" layer add two perspective lines using the
line tool:
Start from the lower left corner and draw to the near the
top center of the stage and then to the lower right corner
thus making a pyramid shape with no base.
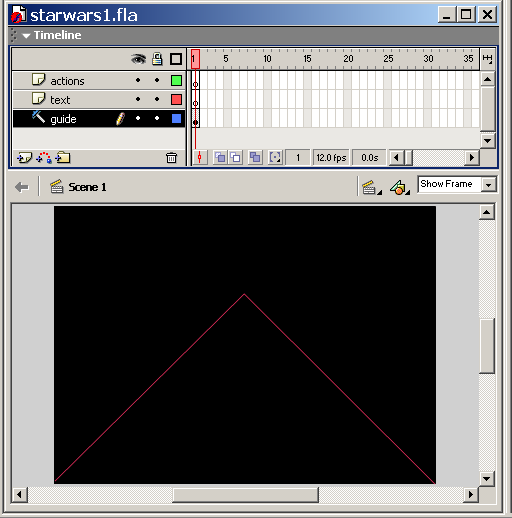
Create your text - Type in
your text into a static text field in the "text"
layer on frame one. Be sure to use a system font (don't use
an embedded font). I suggest that you use a bold font as the
distortion from the perspective shape might make thinner text
more difficult to read. We used ArialBlack Bold 114 pts.
Position Your Text - Lock
your guide layer by clicking on the little lock next to it.
Then move your text box to where the top corners are just
touching the perspective lines
Break Apart Twice - With your
text still selected, break apart your text twice.
The first time you break it apart it breaks the text into
individual letters and the second time it breaks the text
into vector shapes to we can distort it,
Modify > Break Apart (Ctrl + B)
(twice)
Free Transform - With your
text still selected, click on the "Free Transform"
tool
from the tool bar. You will now see a bounding box around
your text.
Select The Distort Modifier
- In the section of the toll bar close to the bottom, there
is a section called options.
Here is where you select the "Distort Modifier"
. Hold down the shift key and select either of the bottom
corners of your text bounding box and then drag to the perspective
line. Both corners will move together as long as you have
the shift key pressed down. After you release the mouse, your
words will be in perspective ready for the tweening effect.
Convert to Symbol - With your
text still selected, convert your text to a graphic symbol
called "text".
Insert > Convert to Symbol (F8)
Be sure that the registration point is in the center.
Scale and Position Your Text
- Scale your text box so it is as wide as the stage and move
it directly below the stage.
Add Key Frames - Extend the text and the guide layers to
frame 180 by adding key frames in each of those layers at
frame 180.
Set up the final key frame
- Click in the key frame at frame 180 of the text layer. This
is the final target for the tween we will do in a minute.
Change the height and width to 10 pixels each in the property
inspector. Then, move the tiny text field up to the top of
the pyramid.
Set the Brightness - In the
property inspector, select brightness and set it to -50%.
This is to make the text fade as it gets nearer to the vanishing
point.
Add Motion Tween - Click on
one of the frames in between frame 2 and 179 in the text layer
and add motion tween: Insert > Create Motion Tween
Set the easing - In the property
inspector, set the easing to 75 to make the text slow down
as it moves away.
Done - The effect is done.
Test your movie to see the effect.
Control > Test Movie (Ctrl + Enter)
Add the star field - Click
in the actions layer in frame one and bring up the actions
window.
Window > Actions
The select "Expert Mode" from the pull down to the
right of the actions window.
Add the actionscript - Type
or paste in this script into the actions window:
Create Symbol - We need to
create a symbol for the dots that represent the stars in the
star field.
Insert > Create New Symbol
Be sure to name it dot, for behavior select Graphic, under
Linkage be sure to name the identifier as "dot",
check Export for Actionscript and Export in first frame.
Make your graphic - Make a
dot in your dot symbol by selecting the oval tool, clicking
on no border in the selection tool and white for the color,
then size it in the property inspector to 2 pixels by 2 pixels.
Use the align tool to be sure that your dot is in the center
of your stage.