| Parkland
College > Fine & Applied Arts
> Graphic
Design | Web Design
>
GDS 214 WEB DESIGN II
|
|
|
|
Making Frames Work for You |
|
|
|
Frames base web sites can offer advantages as well as limitations. You will learn that for many web sites, the advantages of using frames far outweigh the disadvantages This lesson's purpose is to show you how make use the advantages and to turn the limitations into advantages also. We'll make a simple web site to show you the techniques to make your frames sites more professional, functional and interactive. Why use frames? With Frames your web pages can be easily formatted to automatically fit the user's monitor size and resolution whereas with layers you have to put up with the differences in how browsers display your content. If you format your frames pages correctly, your pages will look almost identical in new browsers as well as old, in Netscape or Internet Explorer or what ever browser your visitor might be using. How's that for an advantage. By putting your content into separate frames pages, your content is easier to manage and this saves you time. You can run a simple Javascript in it's own frame and you don't need to worry how it will react with the other scripts and features on your page. You can use very simple html pages for your text because all of your main elements like the logo will be on other frames so when the visitor clicks on a link, your text pages will load almost instantly even on the slowest connection. And what about the disadvantages? No problem... Lets get started For your frameset: |
<script language="JavaScript">
<!--
if (parent.location.href != window.location.href) parent.location.href = window.location.href;
-->
</script>
|
|
|
Note: This script
is not limited to frames pages, you may want to use it to be
sure that your regular html pages don't end up in somebody else's
frame. |
|
|
|
For your Frames... Insert the following JavaScript into the HEAD section on all of your frames pages. The only change you need to make is where I have "Frames_Example.html" change it to the name of your frameset (your main page). |
<SCRIPT LANGUAGE="JavaScript">
<!--
if (window == top) top.location.href = "Frames_Example.html";
// -->
</SCRIPT>
|
|
|
Now your frame pages will never be displayed without the frameset. The Meta Refresh Tag The meta refresh tag is an easy way to automatically replace
one frame page with another inside your frameset. Basically
what it does is allows you to create a series of pages that
go from one to another. You set the amount of time in the meta
refresh tag that you want the page displayed and then designate
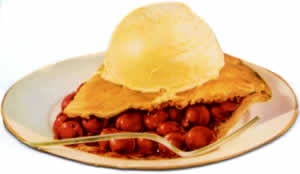
what page you want to come next. It's really that easy. Lets do one in dreamweaver. First you need a few images for your slide show. I selected 4 images for my slide show:
Now we need to make our pages: Create a new basic page in Dreamweaver. Change the title to pie and save it as pie.html Click in your window and then insert pie.jpg Click on the center selector in the property inspector.
Now we want to preload the next image (sandwich.jpg) that will be on the next page. Be sure that the behaviors inspector in open. Click on the plus sign and select preload images.
Click on browse and select your image (sandwich.jpg). Click ok.
Change the event handler for the preload images behavior from onclick to onload.
Now your image will preload for the next page. Next we will insert the meta refresh tag. Insert > Head Tags> Refresh
Type in 10 in the delay box and type in sandwich.html in the Go to URL box. Then click Ok.
Save your work (pie.html). We are finished with the first page. Now we need to create the remaining 3 pages in our series. Instead of going through this process over again, we are going to modify this page to create the remaining pages. We are going to use the global replace command to make our modifications. Edit > Find and Replace First we are going to change our preload image from sandwich to sunday so it will be ready for us when the page gets there. In the window, make sure current document is selected, change the Search For pulldown to Source Code and type in sandwich in the box. In the Replace With box, type in the word sunday and click replace all. A window will open up telling you that Dreamweaver change the text in one place.
Now we will replace the page to sandwich so we will repeat the process with different words. Edit > Find and Replace In the window, make sure current document is selected, change the Search For putdown to Source Code and type in pie in the box. In the Replace With box, type in the word sandwich and click replace all. A window will open up telling you that Dreamweaver change the text in two places.
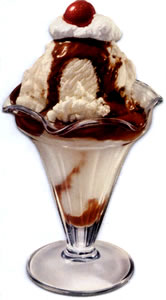
Save your page as sandwich.html. Now we have two pages pie.html and sandwich.html. We will create the third page the same way as we did this one except this time we will globally replace the word sunday to eat and then sandwich to sunday. Edit > Find and Replace
Edit > Find and Replace
Save your page as sunday.html. Now we have three to the four pages. The last page eat.html will be different because we neither need to preload any more graphics or need to be routed to another page. So what we will do is take out the preload behavior and the meta refresh tag. Then we will replace our image sunday.jpg with eat.gif. Click on the body tag beneath the window to the left. In the Behaviors window, you should now see your onload function. In the behaviors window, select your behavior and then click the minus sign. You behavior is now removed for this page.
Now we will remove the meta refresh tag. Click on code view. Use the button or: Delete Now we replace the picture. Click on the picture and in the property inspector change the src to eat.gif.
Save your page as eat.html. Our slide show is now complete. open your pie.html page in a browser and see for yourself. Adding Transitions: open pie.html in dreamweaver. Insert > Head Tags > Transitions
Select a transition. I picked circle in.
Repeat the process for all of your pages. On each of your pages, copy and paste <meta http-equiv="Page-Enter" content="RevealTrans(Duration=5,Transition=2)"> Change it to: <meta http-equiv="Page-Exit" content="RevealTrans(Duration=5,Transition=2)"> For more information on frames go to:
|


| |
|
|
|
______________________________ Last updated: 10/01/03 Webmaster: Paul Young |