|
Parkland
College > Fine & Applied
Arts > Graphic
Design | Web Design
>
GDS 214 WEB DESIGN II
|
|
|
|
Slice and Dice for Frames
|
| |
|
Next we will slice up our PhotoShop 7 psd file and insert the images in frames in Dreamweaver MX. Open your file in PhotoShop. If you don't have a copy you can
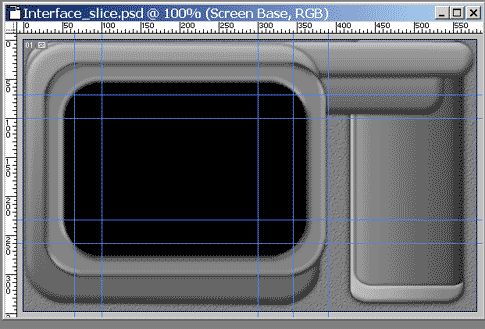
download it here: Clear your guides View > Clear Guides Insert Vertical Guides at:
Insert Horizontal Guides at:
View > New Guide *Note: Shift Dragging locks the guides exactly on pixels (important for slicing.)
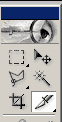
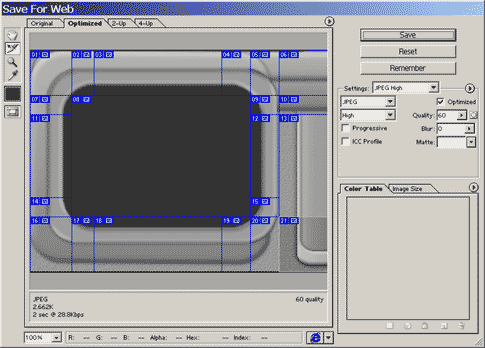
Slicing Your image Click on the slice tool icon
the slice tool
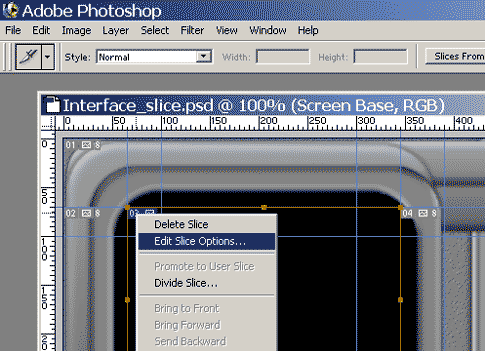
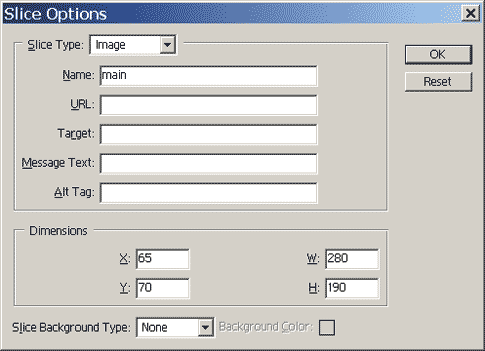
Drag a slice from 65,60 to 345, 260. Left Click (ctrl + click on Mac) on the little blue tab on the top left of the slice. Click on Edit Slice Options
Change the name to main and click ok.
Draw in the rest of your slices.
Save your work as Interface_slice.psd File > Save as Now we slice our image. File > Save for Web
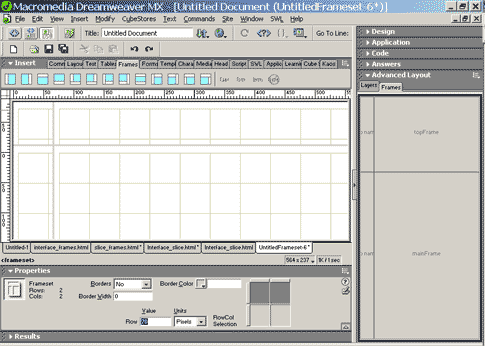
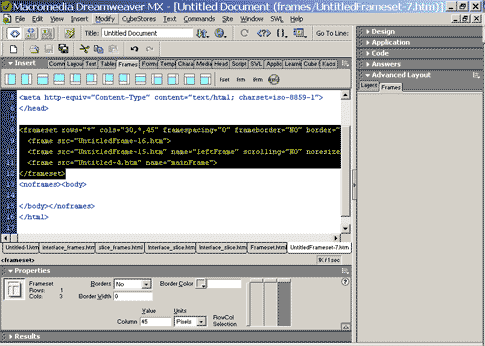
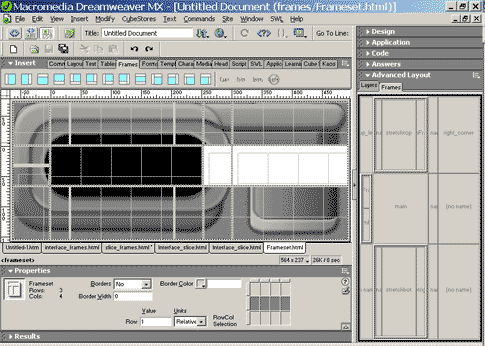
I changed the type to jpg. Be sure to save as HTML and Images. Click OK and make a folder to put your images in. Save. Making your frames pages Open Dreamweaver MX File > Open Open the html page that you just made in PhotoShop Mine is called Interface_slice.html File > New Open a new document Edit > Save as Save it as MyFrames.html Insert > Frames > Top Be sure the Advanced Layout pallette is open and clicked on the Frames tab. Window > Others > Frames Drag a frame into the stage from the left side to about 65 px. In the property manager set the borders to no, the width to zero and the rows to 70 px.
Click on the columns tab in the property inspector and chang the value to 65.
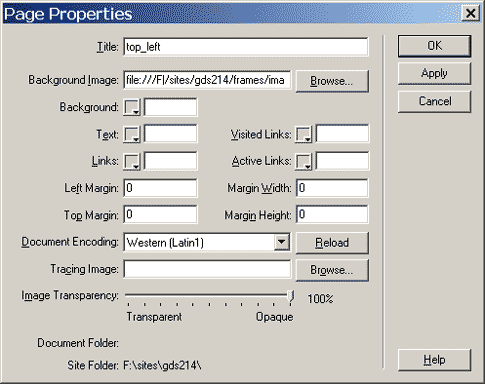
Click in the first frame at the top that you just made. Modify > Page Properties
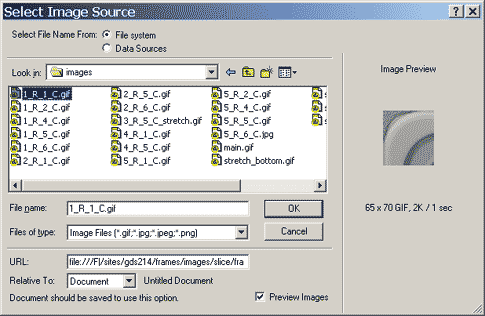
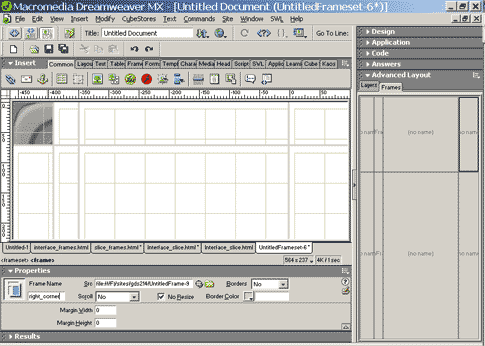
Name your page to something you can remenber, set the Left Margin, Top Margin, Margin Height, and Margin Width to zero. Click on Browse next to Background Image and select 1_R_1C.gif
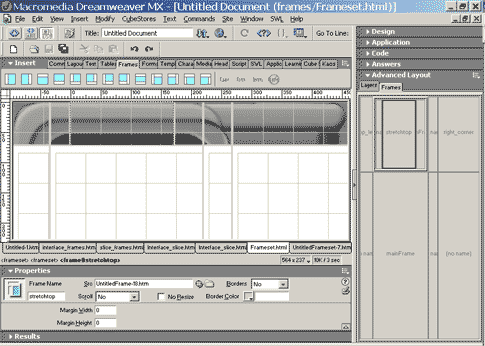
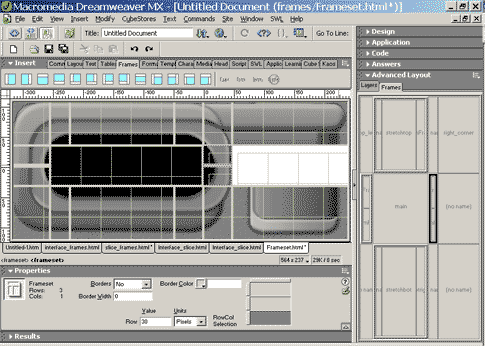
Now we will repeat the process for the top right frame. Drag 2 more frames out of the left side. Click in the top right frame in the frames panel. C In the property inspector, change the name to right_top, Scroll to No, Check the no resize box, Borders No and margin width and height should be set to zero. Go back and do this for your first frame after you get done. Repeat the process on any static frames. Click in the right top frame on the stage. Modify > Page Properties
Make the mods. Back in the stage, click on the border of your frameset and click on the top right row in the property inspector and change the width to 190.
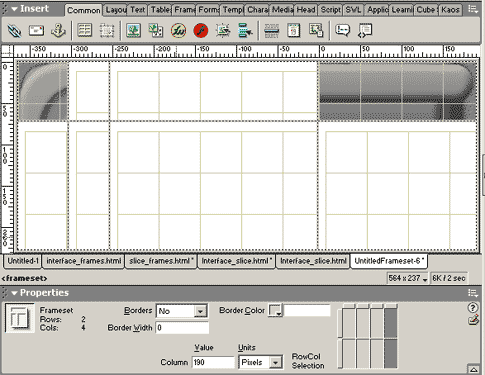
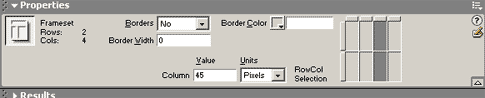
Click in the second frame from the right and set the properties as before. Set the page properties as you previously did seeing the background image to 1_R_5_C.gif Click on the frameset and select the forth colum in the property inspector and set it to 45 px.
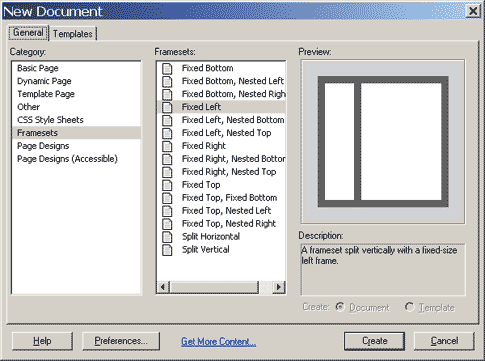
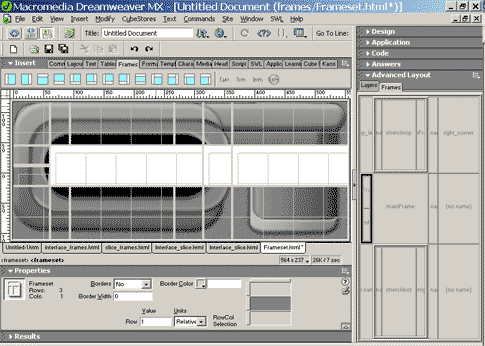
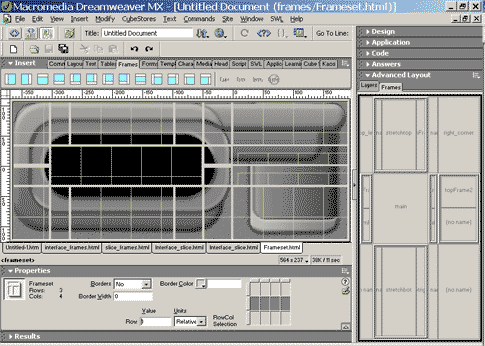
Nesting Frames Next we will insert another framesset into the the second frame containing 3 more frames. File > New Select Frameset and fixed left.
Drag a new frame into your document from the left. Using the property inspector after clicking on the frameset, set the first colum to 30 px, the second to relative and the third to 45.
Click on view source and copy the frameset. Click in the second frame in the window on your original frameset. View source and replace the second frame with the new frameset. Change all of the document progerties for the three frames, add the appropriate background images, etc.
Close your new untitled frameset without saving. Your first row should now be completed.
Click on your frameset and drag a row out from the bottom. In the property inspector make the row 87 px.
Repeat the same process that you did for row 1 for all of your pages including the nested frame. Insert the background images, set properties, etc.
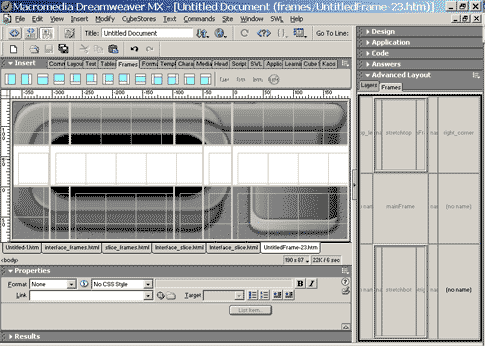
Click in the first frame in the middle where there is currently nothing. Insert > Frames > top and bottom Click in each of the three new frames and update the page properties etc. Set the rows for 30 px, relative, and 30 px.
Insert the main gif into the frame for main. Update p[age properties, etc. Rename the frame to main. Make sure the row height is relative.
Click in the next (third) frame (column). Insert > Frames > top and bottom Insert your background images, set page properties, row height, etc, like we have been doing so far for these three frames. Set the row heights for 30 px, relative, and 30 px.
Click in the final frame. Insert > Frames > top Fill in the last two remaining pages the same as we have been doing. Make the row heights 30 px and relative.
Look over everything to be sure that you have all of the margins set at zero, etc. We are done with inserting you images into frames for now. View your page (F12). Here is the final file:
Here is another version that I changed to blue: Here is the frames version: blue_frameset.html
|


|
______________________________ Last updated: 8/26/03 Webmaster: Paul Young |