| Parkland
College > Fine & Applied Arts
> Graphic
Design | Web Design
>
GDS 214 WEB DESIGN II
|
|
|
|
Slide and Blur - Flash This lesson is similar to the lesson we did a few weeks ago that I called slide. The class didn't seem to be to excited about it so I did something similar here but this time I added a blur to make it a little more interesting. Instead of using simple images like I have been doing for these demonstrations, you should use collages instead. Since you are all graphic art students, I shouldn't have to tell you how to be creative. Use your gift. Add your text, buttons and links on each of the pages (images).
Add text effects and sounds if you wish. This lesson is simple
but it could be the basis for a very eye catching presentation.
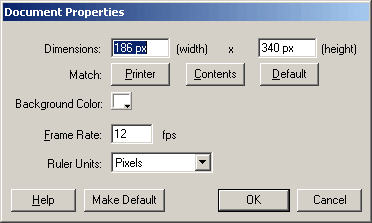
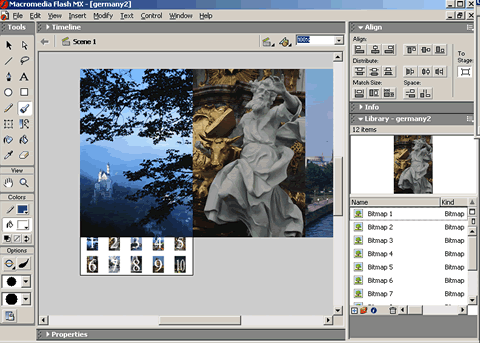
Files: In Flash... Open a new file. Modify > Document Make your document a bigger than your images. My images are 186 px wide and 278 px tall each. I needed a little space to but my buttons underneath my pictures so I made mine 186 px by 340 px.
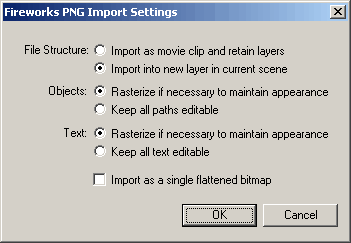
Either import your images as one long strip from an image editing program such as PhotoShop or Fireworks or import them individually. If you save the file as a png, Flash will allow you to import your pictures as one long strip and put them in your library as individual images that you can use as buttons if you wish. That's what I did. If you don't already have an images, import germany2.png for this exercise.
With the images still selected, convert to a movie clip and name it "filmstripbig" Insert > Convert to Symbol
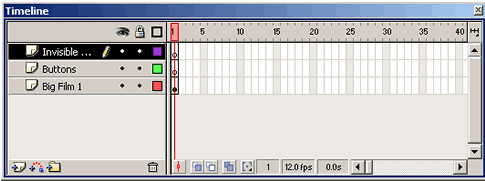
Change the name of layer 1 to big film1 and create two more layers named buttons and invisible buttons respectively.
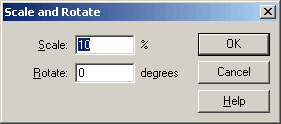
In the buttons layer, drag in a copy of your first image from the library onto the stage under your graphic. Window > Library (F 11) Scale your image to 10%. Modify > Transform > Scale and Rotate (Ctrl + Alt + S)
Move your resized image to approximately where you want it at the bottom of the stage underneath your image. Repeat.. Drag and Drop each of your images onto the stage from the library, resize them using the Scale and Rotate Transform Tool, and then place them in an orderly fashion under your image. I arranged mine in two rows of five since I have ten pictures in my main movie.
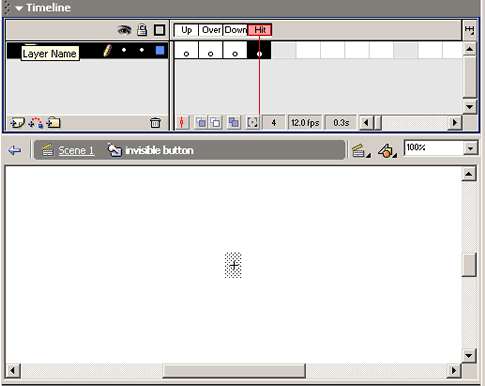
Use the align tool to align your images as necessary. I lined up the top five images and selected all of the five. Then I clicked on the button to be sure that the images are not lined up with my stage. Next, I clicked on "align vertical center" and "space evenly horizontally". Then I aligned my bottom 5 images as well as I could by hand. I then used the property to be sure that the x for the first and the last images were that same as the picture above it, then I used the "align vertical center" and "space evenly horizontally" in the align panel again. While all of the bottom five images were still selected, I used the arrow keys to move the row of images images vertically into place. Creating the buttons and the moviesCreating the invisible button. Lock all the layers except the invisible buttons layer. Click in the first frame of invisible button layer, and use the rectangle tool to draw a rectangle with a solid color fill and no stroke over the first image that you want to use as your button. Select the new rectangle you just created and then change it into a button symbol. Insert > Convert to Symbol (F8) Name it "invisible button". Double click on the invisible button and you will enter symbol editing mode for the button. Add keyframes in each of the states of the button. Insert > Keyframe Delete the rectangle from each of the button states except for the hit area.
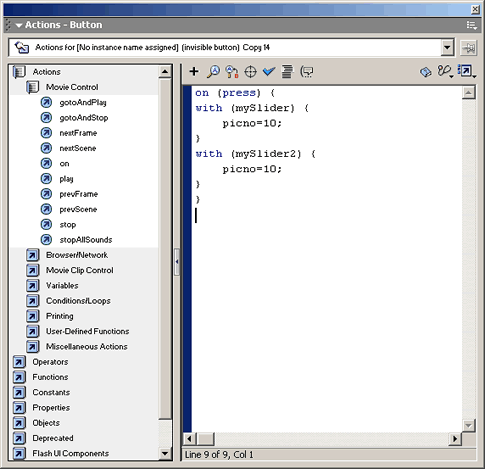
Click on Scene 1, to return to the main scene. Drag nine more invisible buttons from the library into your stage and place them directly above each of your images that you want to use as buttons. Adding the actions to the buttons Select the first invisible button and then open the actions panel. Be sure that you are in expert mode. Type in: on (press) {
Select the second invisible button and repeat the above step except this time change the picno to 9 on (press) { Repeat the process until all ten of your buttons have the actionscript in them. Your final invisible button should read: on (press) { What does the button script do? What we are doing in the invisible buttons is when the visitor presses the button, two identical movies are going to move into place. The first will move a little faster than the second producing the blur effect. I numbered the buttons from 10 to 1. You could have used 1 to 10 and it wouldn't have mattered.
Unlock your Big Film 1 layer and lock all of the other layers. Select all of your movie clip (filmstripbig) in frame 1 of the Big Film 1 layer. Name the instance "mySlider" in the property inspector.
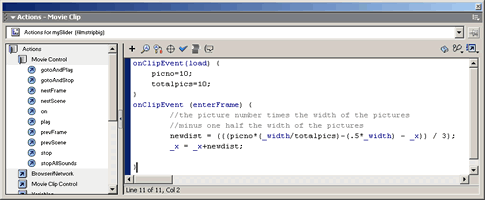
Select the first frame in the Big Film 1 layer and open the actions panel. Window > Actions In the actions panel, in the expert mode, type in: onClipEvent(load) {
What did we do here? //first we set up our variables for when the clip loads Add the motion blur Select frame one form the Big Film 1 layer and choose: Create a new layer directly above the "Big Film 1" layer and name it "Big Film 2" Select the first frame and paste in your layers Edit> Paste Frames Select the instance of filmstripbig by first clicking on the first frame of the Big Film 2 layer and then clicking on the image. Name the instance "mySlider2" in the property inspector. Change the alpha to "50%"
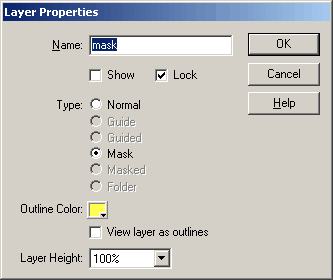
Select the first frame of the Big Film 2 layer and open the actions panel. Window > Actions In the expert mode in the actions panel, type in: onClipEvent(load) { Note: The only difference between the first and the second script is now the 3 that we divided by previously is now a 4. This have the effect of slowing down the second film strip which creates the blur effect. Adding the mask Create a new layer above the Big Film 2 layer and name it mask. Draw a rounded rectangle with rounding set to 25 pixels with no stroke and a solid fill over the area where you want your pictures to exhibit. Position and size the mask accordingly. Double click on the little symbol next to the name in the timeline frame to bring up the layer properties inspector. Check: Mask
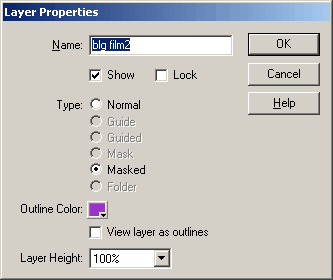
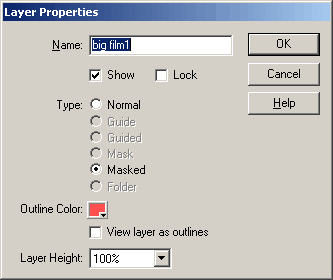
Do the same thing for the two layers below the mask layer except check: masked
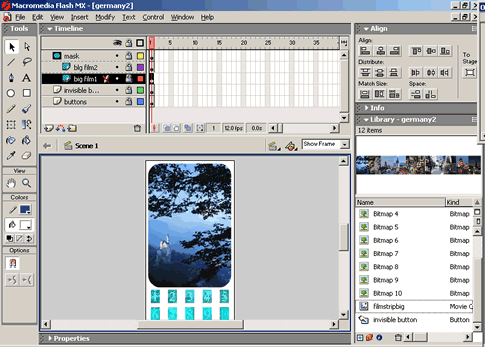
Your movie should now look like this:
Save your work and test your movie. Files: Variation Auto Play - No buttons Here is a version that autoplays instead of using buttons. Save your file as germany3 Add a new layer above all of the rest called actions. In frame one of the actions layer add this code in the actions panel: duplicateMovieClip("filmstripbig", "mySlider",
0); Create Keyframes at: 1, 3, 27, 51. 75, 99, 123, 147, 171, 195, 219 At the keyframe at 3, add the script in the actions panel: with (mySlider) { At frame 27: with (mySlider) { At frame 51: with (mySlider) { At frame 75: with (mySlider) { At frame 99: with (mySlider) { At frame 123: with (mySlider) { At frame 147: with (mySlider) { At frame 171: with (mySlider) { At frame 195: with (mySlider) { At frame 219: with (mySlider) { At frame 243: Add a keyframe on all layers Change your picno variable to 1 in each instance of your image movies of mySlider and my Slider2 in frame 1 of the big Film1 and big Film 2 layers so the movie will start out with picture 1 instead of 10 as it does in the last movie. onClipEvent(load) { Delete the buttons and the invisible buttons layers. If you want to make your pictures change slower, add more frames between your keyframes to make you movie longer. Save and text your movie. Files:
|
|
|
|
|
|
|
|
|
|
______________________________ Last updated: 11/12/03 Webmaster: Paul Young |
|
|
