| Parkland
College > Fine & Applied Arts
> Graphic
Design | Web Design
>
GDS 214 WEB DESIGN II
|
|
|
|
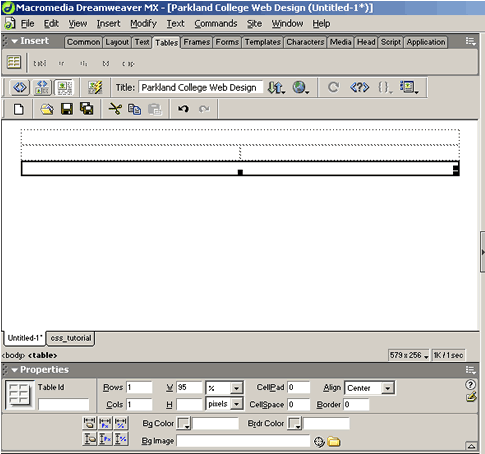
Using CSS in Dreamweaver The Home Page Create a new html document in Dreamweaver. Add a new table:
Select the table and use the property inspector to align it to center. Insert a second Table:
Select the table and use the property inspector to align it to center. Add a third table:
Select the table and use the property inspector to align it to center.
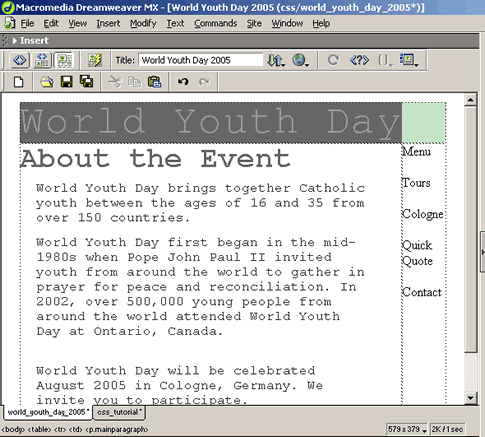
type in your title. In this example, I typed in "World Youth Day." I also typed in "World Youth Day" in the title box. Click in the second table in the left cell and... type in your home page title. I typed in "About The Event" Type in or paste in your text for your main page I pasted in the following text below it: World Youth Day brings together Catholic youth between the ages of 16 and 35 from over 150 countries. World Youth Day first began in the mid-1980s when Pope John
Paul II invited youth from around the world to gather in prayer
for peace and reconciliation. In 2002, over 500,000 young people
from around the world attended World Youth Day at Ontario, Canada. World Youth Day will be celebrated August 2005 in Cologne, Germany. We invite you to participate. In the right column of the second table... type in your menu. I used: Menu
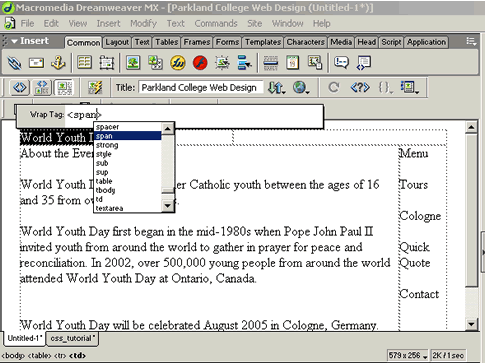
In the third (bottom) table type in... your copyright information or your contact info (phone number). I used: © 2003 club europa travel In the property inspector, set the horzontal cell property to center. Assigning CSS Classes to sections of the page Select the page title text (World Youth Day), and right click. Click on "wrap tag" Type in "span"
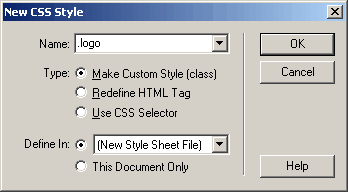
Adding the CSS Use the pulldown in the property inspector and select "new CSS style" or Text > CSS Styles > Add New Style Type in .logo for the Name, be sure that Make custom style and NewStyle Sheet are selected then click OK.
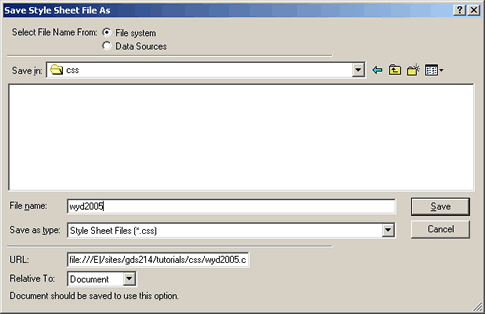
Save and name your style sheet.
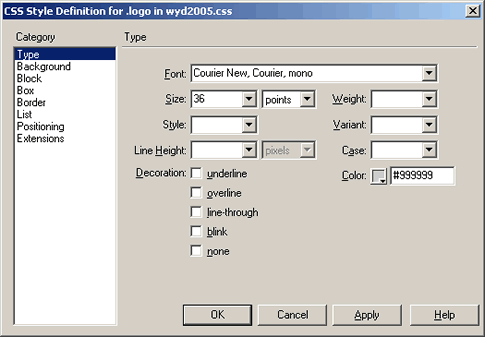
I named mine wyd2005.css In the Type Section of the CSS Style Definition box, type in:
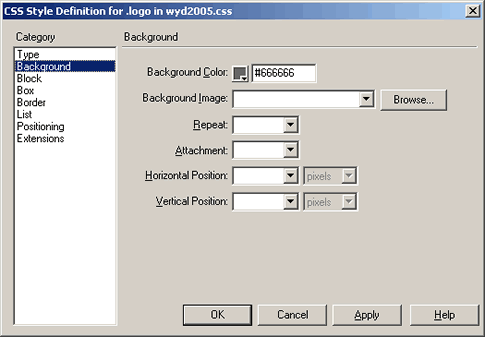
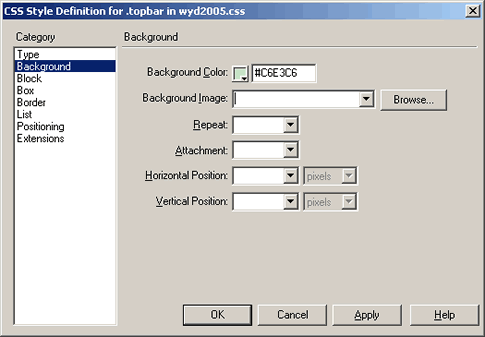
In the Background Section, type in...
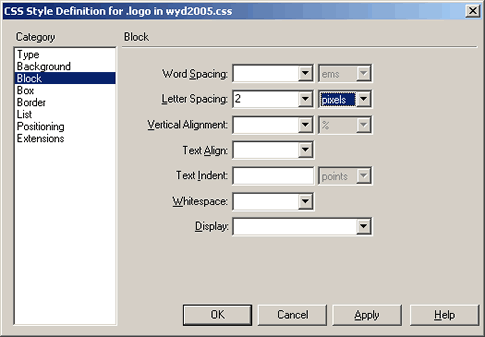
In the Block section, type in:
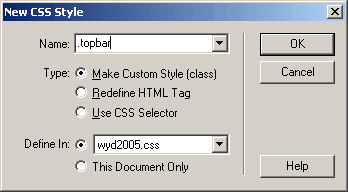
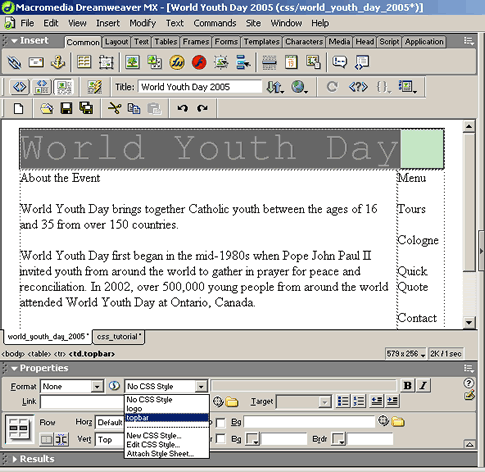
Click Apply and OK Insert the cursor somewhere with in the phrase you just wrapped with the span tag and in the property inspector in the css window, pull down the css style that you just made (.logo) and select it. Your text should now have the css formatting applied to it. Next we'll make the css style for the top bar color. Of course, I named it: .topbar Define it in the sames CSS Sheet (wyd2005.css) Text > CSS Styles > New CSS Style
Select Background and change the Background Color: #C6E3CG
Click Apply and OK. Applying the .topbar style to your top bar Select the first row in your table, then select .topbar in the css section of the property selector.
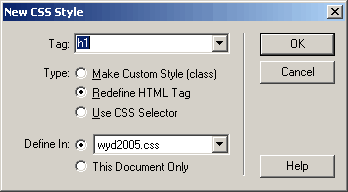
We'll need to make the css style for the page heading (About the event) Text > CSS Styles > New CSS Style or use the pulldown in the property inspector. This time we will redefine the h1 tag.
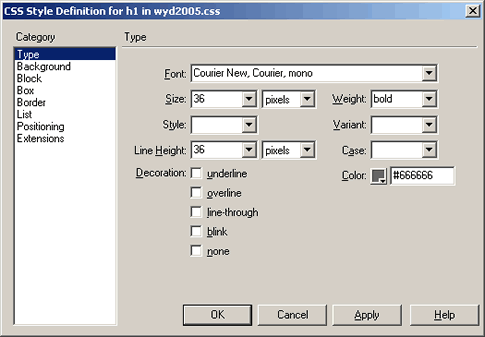
Define it in the same CSS Sheet (wyd2005.css) Under Type, use the following definitions:
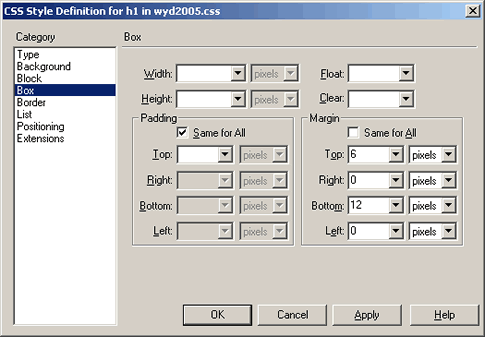
Under Box Set the Margin at:
Highlight (select) the heading text (About the event) and use the Format pulldown in the property manager to select h1. You should be able to see your h1 style applied to the heading. Now we'll make the css style for the main text. Of course, I named it: .mainparagraph Text > CSS Styles > New CSS Style or in the property inspector...
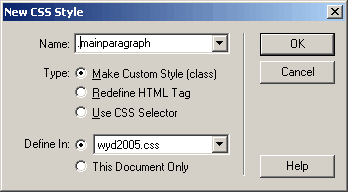
Again, define it in the same CSS Sheet (wyd2005.css)
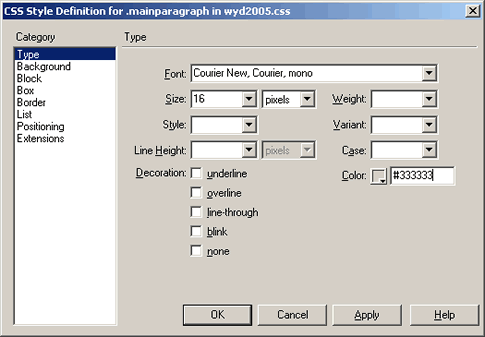
Be sure to check Make Custom Style (class) Under Type, select:
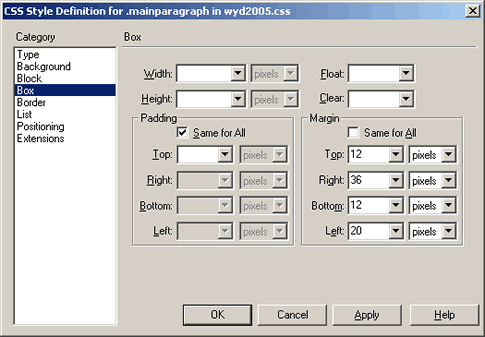
Then under box set the Margins at:
Select your pagagraph tags in the main body text and apply the .mainparagraph style.
Create a new style called .sidebarbg Make the background color: C7E7C7 Apply .sidebarbg to the right column <td> of the second table. Let's also make an identical style called .bottombar with the background as the same as above (color:C7E7C7) Apply .bottombar to the row <tr> in the bottom table. For the text that says "Menu" in the right column of the second table we will redefine the h2 tag.
Apply the h2 to the word "Menu" Create another style called .copyright
Select the copyright notice text in the bottom table and left click on it. Then select wrap tag ans type in <span>. Select the <span></span> contents and then apply the style .copyright. Create a new style called .sideparagraph and apply it to the paragraph tags in the right column of the second table.
Redefine the Body tag so the Background is #FFFFFF (white)
|
|
|
|
|
|
|
|
|
|
______________________________ Last updated: 11/12/03• Webmaster: Paul Young |
|
|
